
Ready to take your digital creations to the next level? The revolutionary OmniHuman technology by ByteDance, accessible through the Dreamina platform, lets you turn any static image into a talking AI avatar with incredibly realistic movements and lip-sync. Forget complicated animation software; with this Dreamina and OmniHuman tutorial, you’ll be creating stunning, professional-looking videos in minutes.
In this comprehensive guide, we’ll show you step-by-step how to use Dreamina to:
- Bring photos of people, unique characters, or even illustrations to life with your own voice or a selection of AI voices.
- Create engaging content for social media, dynamic presentations, educational materials, or just for fun.
- Leverage advanced AI lip-sync, natural-looking facial expressions, and full-body animation features powered by OmniHuman.
Let’s dive into the fascinating world of AI avatars and discover the creative power of Dreamina combined with OmniHuman technology!
What is Dreamina and its OmniHuman Connection?
Dreamina is ByteDance’s versatile creative platform that, alongside other AI tools like image and video generators, offers a powerful AI Avatar (often referred to as Lip Sync or Talking Head) feature. This specific tool is engineered to utilize the advanced core algorithms of OmniHuman technology. This synergy allows Dreamina to produce those ultra-realistic human animations, complete with synchronized speech and expressions, from just a single image and an audio track. So, when you’re using the AI Avatar feature in Dreamina, you’re directly tapping into the sophisticated capabilities of OmniHuman!
Dreamina has been presented as an accessible platform, and it even offered free generation credits at its launch, making it easy for users to start experimenting.
Getting Started with Dreamina: Sign-up and Access
Getting started with Dreamina is straightforward. Here’s how to begin:
- Visit the Dreamina Platform: Access the official Dreamina platform by ByteDance here: dreamina.capcut.com. This is where you will sign up or log in to use the AI Avatar tool.
- Sign Up / Log In: The registration process is usually quick (often allowing sign-up with existing accounts like Douyin or phone numbers, or specific CapCut credentials). Access to many features, including a certain amount of free generation, is often granted upon successful sign-up.
- Navigate to the AI Avatar Tool: Once inside the Dreamina platform (be it a web interface or app), look for the specific tab or section labeled “AI Avatar,” “Lip Sync,” “Talking Photo,” or a similar term. In many demonstration videos, this feature is accessed via a clearly marked, dedicated tab within the main interface.

Step-by-Step Guide: Creating Your AI Avatar with Dreamina & OmniHuman
Now for the exciting part! Follow these detailed steps to create your first AI-powered talking avatar video:
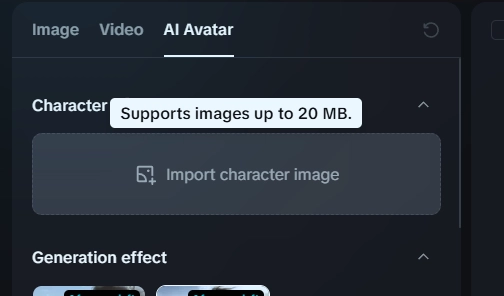
Step 1: Upload Your Reference Image
The foundation of your animated avatar is a single static image.
- Action: Within the “AI Avatar” interface in Dreamina, you will find a clearly marked option or area to upload your chosen image. You can usually drag and drop the file directly or click to browse and select the image file from your computer or device.
-
Important Image Tips for Best Results:
- Quality Matters: While Dreamina (powered by OmniHuman) is adaptable, starting with a clear, well-defined, and reasonably high-resolution image of the face or body will yield the most impressive and realistic results. Front-facing portraits often work best.
- Diverse Subjects Welcome: Don’t limit yourself! Experiment with photos of real people, AI-generated portraits, 3D characters, cartoon or anime-style illustrations, and even some animal images (though, as noted later, talking animation for animals might be more subtle).
- Aspect Ratio Flexibility: The tool typically supports various aspect ratios, such as 16:9 (landscape), 9:16 (portrait/vertical for social media), or 1:1 (square). Choose based on your intended output.
- Composition Versatility: You can effectively use close-up portraits focusing on the face, medium shots showing the upper body, or even full-body images, as OmniHuman technology is capable of animating the entire body with coherent movements.
Step 2: Add Your Audio Input (Voice, Speech, or Music)
Your avatar needs a voice or sound to bring it to life. Dreamina generally offers two main options for this:
-
Option A: Upload an Existing Audio File
- Action: Look for an “Upload Audio,” “Import Sound,” or similar button. Select this to upload an audio clip from your device (common formats like MP3, WAV, M4A are usually supported).
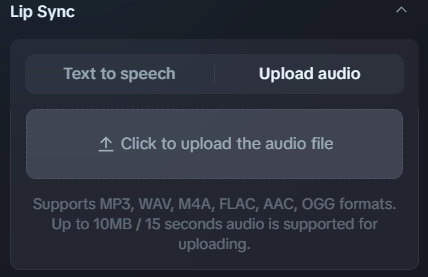
- Content Ideas: This could be your own recorded voice, a voiceover, a snippet of a speech, a line from a script, a song (for singing avatars), or even a tongue-twister to thoroughly test the lip-sync capabilities! The system generally supports various languages, including English, German, Japanese, Spanish, and others, with impressive lip-sync accuracy.
- Action: Look for an “Upload Audio,” “Import Sound,” or similar button. Select this to upload an audio clip from your device (common formats like MP3, WAV, M4A are usually supported).
-
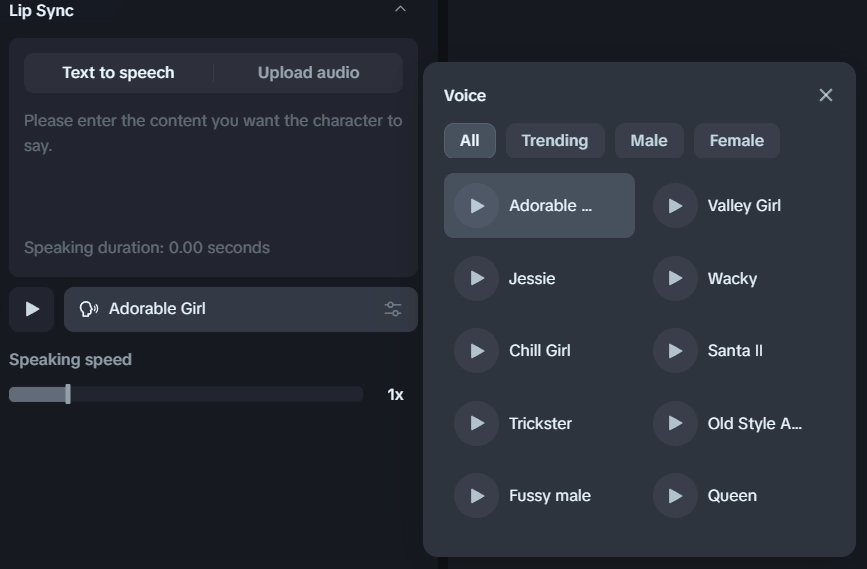
Option B: Use Integrated Text-to-Speech (TTS)
- Action: Find the Text-to-Speech input field. Type or paste the text you want your avatar to speak directly into this box.
- AI Voice Selection: Dreamina typically offers a selection of different AI-generated voices (male, female, various accents or tones). You can usually preview these voices to choose the one that best suits your character, image, or the message you want to convey.
Step 3: Configure Optional Settings & Generate Your Video!
With your image and audio ready, you’re almost there:
- Action (Optional Settings): Before generating, check if there are any optional settings you can adjust, such as animation style, background options, or output quality, depending on the version of Dreamina you are using. (This might not always be present).
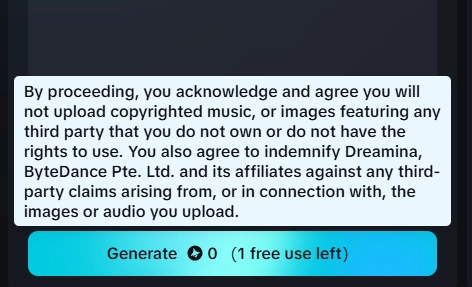
- Action (Generate): Click the “Generate,” “Create Video,” or a similarly labeled button to start the AI animation process.
- Patience is Key (Wait Time): High-quality AI video generation, especially with the advanced realism offered by OmniHuman technology, can take a few minutes. The reference video for this tutorial mentioned approximately 2-3 minutes per generated clip, but this can vary based on video length, server load, and complexity. Be patient; the AI is working its magic!
Step 4: Preview, Refine (If Needed), and Download Your Creation
Once the generation process is complete:
- Action (Preview): The generated video will typically appear in the Dreamina interface. Play it to review the result. Check the lip-sync, expressions, and overall movement.

- Action (Refine – Optional): If the result isn’t quite perfect, or if options are available, you might be able to make minor adjustments or try generating again, perhaps with slightly different audio or image emphasis (if supported).
- Action (Download): If you’re happy with your AI avatar video, look for the “Download” button or icon to save the video file (usually in MP4 format) to your device.
Maximizing Impact: Key OmniHuman Features & Pro Tips
The OmniHuman technology within Dreamina delivers truly impressive results. To help you get the most out of it, keep these powerful features and pro tips in mind:
- Achieving Realistic Animation: Notice the natural blinks, subtle head and body movements, and how the avatar emphasizes certain words. Use audio with clear intonation and natural pauses to enhance this believability.
- Leveraging Full Body & Hand Animation: Remember, it’s not limited to the face. If your input image includes the body, OmniHuman can animate it, including hand movements (even when holding objects). It can even simulate subtle camera pans if the composition allows, adding dynamism.
- Conveying Emotional Expression: The avatar can reflect the tone and emotion in your audio input, such as concern, enthusiasm, or seriousness. Choose or record audio that clearly conveys the desired emotion.
- Multi-Language Lip Sync: The AI lip sync performs exceptionally well with various languages. Feel free to experiment with non-English audio.
- Animating Singing Characters: It can effectively animate characters singing. However, expressiveness can vary, and very long, sustained notes might occasionally result in a temporarily frozen expression. Shorter, more dynamic vocal phrases often work best.
- Working with Diverse Image Styles: From realistic photos of people (like the examples of Jensen Huang or Sam Altman often seen) to 3D Pixar-style characters or 2D anime-style illustrations (such as Sailor Moon), the tool adapts remarkably well. Don’t be afraid to try unconventional art styles.
Pro-Tips for Best Results:
- Image Quality is Key: Start with high-quality, well-lit images where facial features are clear and unobstructed for the most refined output.
- Clear Audio Input: For custom audio uploads, ensure your recordings are crisp, with minimal background noise, and spoken/sung at a natural pace. Avoid heavy audio effects on the voice itself before uploading.
- Experiment with TTS Voices: If using Text-to-Speech, preview multiple AI voices to find the one that best matches your character’s age, gender, and persona.
- Iterate with Short Clips: When testing a new image or a complex audio piece, consider generating a very short segment first (e.g., 5-10 seconds). This allows you to quickly assess the quality and make adjustments before committing to a longer generation time.
- Consider the Background: While OmniHuman focuses on the character, a simple or non-distracting background in your source image can help keep the viewer’s attention on the animated subject.
Understanding Limitations and What to Avoid (Based on Initial Tests)
Like all rapidly evolving technologies, especially in their early public-facing versions, there are some limitations and scenarios to be mindful of for optimal results:
- Multiple Faces in One Image: If your uploaded image contains several distinct faces in the foreground, the AI might attempt to animate all of them or get confused. It’s best to use images with a single, clear primary subject.
- Animating Animals Talking: While OmniHuman can animate animals, achieving convincing “talking” animal lip-sync (like in a cartoon) is very subtle and generally not as effective or pronounced as with human or humanoid characters.
- Handling Non-Verbal Sounds: The system is primarily trained on speech and singing. It typically doesn’t handle non-verbal expressive sounds like laughter, crying, or coughing with the same level of realism or accuracy.
- Complex Object Interactions: Animating very specific, intricate actions like playing a musical instrument accurately (e.g., matching individual finger movements to specific notes on a piano) is still an advanced challenge beyond the typical scope of this tool.
- Image Obstructions: Significant obstructions over the face (like hands, microphones very close to the lips, or heavy shadows) can impact the quality of facial animation and lip-sync.
Conclusion: Unleash Your Creativity with Dreamina and OmniHuman!
Creating compelling talking AI avatars and animated videos has never been this accessible, nor has it achieved such a high degree of realism with such simple inputs, as with the OmniHuman technology available through Dreamina. This guide has provided you with the steps and insights to get started, but the real magic happens when you begin to experiment.
We encourage you to explore its capabilities, test different images and audio, and bring your own unique characters, stories, and ideas to vibrant, animated life. The only limit is your imagination!
Ready to see what others have created or learn more about the core technology?